You are expected to undertake all of the following Familiarisation Exercises. Marks will be awarded for this part of your coursework. The exercises will introduce you to the environment that you will be using to complete coursework for your module. Read through each exercise carefully (even if you believe that you know how to undertake the activity being described) and follow the instructions on a computer. If you need help, ask (your practical supervisor or demonstrator) for it. We expect you to complete all the exercises for this week before next week's practical. If necessary, use computers in one of the ISS PC Windows clusters which can be found in various parts of the campus.
Please note that this document cannot give complete instructions on every tool that you may need to use. There are many things you will need to find out by yourself, by trying things, using on-line help facilities, and by reading on-line and printed documentation.
This document assumes you are familiar with using a WWW browser such as Internet Explorer. If you click on any links, use the browser's "back" button to return to this document.
The main page of on-line ISS documentation can be accessed by clicking on this sentence.
Most of you will have used a computer before, although some may not have, or have used systems different from Windows XP. Click on this link to find out which cluster runs which version of Windows. Even if you think you "know it all" it is worth following all of the instructions below.
The University Information Systems and Services (ISS) provides a number of documents which you can use to help you, and we will not repeat the information here. You can get printed versions of many of the reference guides for free from the ISS (e.g. from the reception on the Ground Floor of Claremont Tower), and in this document we provide links to the on-line versions of the documents.
The following guide - pc01.pdf - prepared by ISS provides basic informatioon about how to get best from the ISS Cluster PCs ISS guide
If you have no experience of managing folders and files in Windows, use the pc02.pdf guide through this link .
When you have logged on to a Windows PC you will see a Desktop with several icons on it. One of these icons is called My Computer, and it will be referred to as such in the following.
Using the left button of the mouse, double click on the Computer icon. (Unless indicated otherwise, all mouse clicks are with the left-hand button.) A new window will appear on the screen with several icons in it. Many of these icons represent various Drives, hardware storage devices. This doesn't mean that the PC you are using has several drives, since many are network drives and represent servers (other computers) elsewhere on the campus. Your own work will be stored on drive H:, which being a network drive means that it will be visible from any PC. In this document, we will refer to this as your Home Directory or Home Folder.
Throughout this course you will be using a number of Applications, such as Programmers File Editor (for editing your C++ programs), Cygwin Bash Shell (for compiling, linking and running your C++ programs) and Microsoft Word (for documenting your programs). To use any of these applications you will need to Launch them. One way of doing this is to use the Start menu. Holding the mouse button down (but don't release it until you are back on the desktop), explore the Start menu to see what is available.
Many applications can be launched simply by copying or otherwise obtaining a file that has already been developed using that application and to double click on that file's icon. However, your C++ program development environment has special features, such as using a combination of icon-based and command-line interfaces, which we'll tell you about in Familiarisation Exercise 6.
The first thing you should do is think about how you are going to organise your own file space. If you create everything in one place (e.g. in your Home Folder) it will be very hard for you to find things, and there is a chance of accidently deleting one file with another of the same name. One sensible approach would be for you to create a folder for each of the modules you are taking and which requires files on the computer, and to keep all files associated with that module in that folder.
So, create a new folder in your Home Folder on the H: drive and rename it with the name of the module (EEE1004). All of the folders and files associated with this module should be placed in this new folder. In the rest of this document, that folder will be referred to as EEE1004, so remember to use the name of your folder in place of that.
Since there will be a number of files you will be creating during these familiarisation exercises, create a second folder inside EEE1004 called GettingStarted.
The files you need are accessed via these WWW pages. You will be seeing links to so-called zip files and to self-extracting archive files. These are two methods of storing files on the WWW for subsequent access, and they actually contain other files that you need. You are going to use an application called PowerArchiver to extract files from these zip files. (If you have your own PC, you may find archivers, such as WinZip or PowerArchiver, are useful for moving your files to/from home via floppy disks.)
Here is a link to a zip file that contains a file needed for Exercise 2.
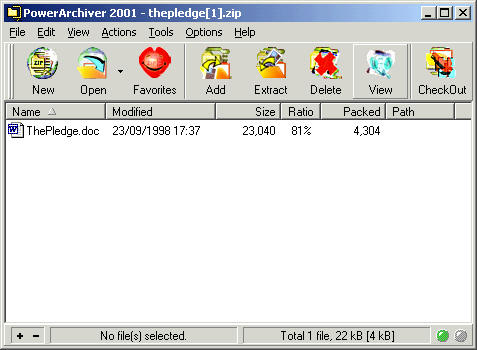
When you click on this link, a File Download window is going to appear. Select the "Open this file from its current location" option and press OK. This will start up the PowerArchiver application, giving you a window like the following on your screen.
Click on the Extract button in the PowerArchiver's window (not on the image above!). Change the text in the Extract To: box so that the folder that PowerArchiver is going to use is your H:\EEE1004\GettingStarted folder. Then click on the Extract button. This will extract a file named ThePledge.doc into the specified folder. Use Windows Explorer to check that you have succeeded in this. You can click on PowerArchiver's minimise button to hide it until you need to use it again.
Using Explorer, inside your H:\EEE1004\GettingStarted folder you should now find the file ThePledge.doc, with an icon indicating that it is a Word document. (You may need to expand your explorer window to see the full file name.)
The contents of this file are important, as it describes on what basis you may use the various computer systems at the University of Newcastle upon Tyne. When you registered with the University you signed a document to say that you agreed to be bound by the various Rules and Regulations of the University. This document is included in those Regulations, so you should understand what you have agreed to undertake.
Double click on the ThePledge.doc icon. This launches the Microsoft Word application and a window will appear on the screen showing the contents of this document.
Details about using Word can be found in the various ISS guides identified elsewhere, and also in the on-line help that Word provides. This is a link to a good starting point.
Read The Pledge and if you have any questions about it, ask your Supervisor or Demonstrator for clarification.
Once you have read and understood The Pledge you should edit the document in the following way. At the end of the first paragraph, at the place marked by the phrase <insert your name>, insert your full name replacing the text in italics (including the < and >). At the end of paragraph E, insert today's date at the position shown. Having made these modifications, you should print out a copy of The Pledge. Click on File, scroll down to Print, and then release the mouse button.
This is your chance to find the printer associated with the cluster of PCs where you are working. Extract your document from the printer, sign it (with a pen!) and show it to your supervisor/demonstrator. They will mark your Exercise Record Sheet to show you have completed this exercise.
It is likely you will want to use email, and the module you are taking may require its use. For example, you may be required to submit project work by email. In this exercise you should
You may find that several people are listed when you look up a surname.
It may help you identify your tutor if you know that staff login IDs all
begin with at least three letters, whereas student login IDs all begin
with n and a digit. If this does not help, then you may wish to read the various
ISS guides available from this link for more advice, or click
" for a specific guide about email.
Access to your personal mailbox is achieved using the
You are probably using a WWW browser such as Internet Explorer to look at this familiarisation document. We will be using the WWW to communicate information about the module, and so you should get into the habit of regularly looking at the relevant pages. In particular you should locate the pages relevant to your module. There are two pages of especial importance:
The year-specific information will change during the year and will
be used to announce details of project work, results from any tests,
etc. You should therefore get into the habit of regularly inspecting
this page to identify any new items. Make this easy by adding these
links to your Favorites.
Locate your school's web pages and browse through them.
To send e-mail, you need to know the other person's e-mail address. There are a number of possible solutions to finding e-mail addresses.
If you still can't find your tutor's email address, ask a person sitting near you what their e-mail address is and send them a message instead. If they do not know their email address, use the WWW pages to find it - it should be there. (At a later date, you should try to determine if your own tutor can receive email. If they can, mail them an appropriate message.)
Email and WWW pages are official communications channels. The excuse "I didn't know how to look there" is not accepted.